Light Keratin Update

Happy Monday beauties! Today, I wanted to give you an update on how the first wash after the treatment went. I’ll tell you right now, it was a success!

image image image

Debating whether to let it air dry or blow dry it, I decided to blow dry it. First, I put in my WEN styling créme in sweet almond mint.

Blow drying was a BREEZE. In about 10 minutes I was done. My hair is now so smooth and shiny and it still has its’ body, minus the frizz!!

I highly recommend this treatment if you want a natural look but want less frizz and a more manageable styling process!

Thanks for visiting! Until next time….

Love and smiles,

Steph

Beat the Humidity!

Hi beauties! If you’re like me and have a frizz-prone mane, the start of July brings on more than just the struggle of being bikini-ready. It means it’s time to start stressing about keeping your hair from frizzing and poofing as soon as you walk out the door.

Sometimes I feel like everything I use to prevent this (from special shampoos and conditioners to moisturizing leave-in products), the humidity always wins 😕.

But fret no more! The keratin treatment might just be the godsend of the summer. Yes, the treatment has been around for a few years now, with various formulas as well as salons and stylists using different techniques with it. But I’ve found one I love!! I’ve gotten the treatment before and I’ve had issues in the past where weeks later, my hair was just always greasy at the root and it was very frustrating.

I don’t want my hair flat and pin straight all the time, which is why I am happy with the way the salon by me does it. My stylist applies the keratin, sits me under heat for about 20 minutes, thoroughly blow-dries my hair, then voila! Silky, smooth, and frizz-free hair for the next few months. Skipping the flat-iron at the end does two things:

1. Saves hair from further heat damage.

2. Maintains the hairs natural body and flow, so you don’t spend the next months not being able to style it or have any volume.

Here are my results:

IMG_1317 IMG_1319

I hope you guys found this to be helpful! We gotta team up and fight the summer frizzes together!

I’ll post an update once I wash my hair to show how it looks after the first wash! Yay!

Enjoy this festive weekend everybody!

Love and smiles,

Steph

instagram: brightskinbrighteyes

From Work to Party

Have you ever had an event on a weeknight, right after work, and frantically started planning exactly how you’re going to re-freshen up, change your outfit, fix your hair, do your makeup, without having time to go home and change? Today I’ll share a few tips on how to deal with such a stressful situation and make your work-to-party transition much smoother.

1. Wear something that is appropriate for both the office and the venue. Something as simple as a sweater or blazer does the trick, as you can easily wear it to the office and take it off at the party so everyone can see your fabulous dress!

2. Don’t wear the makeup you intend to wear to the party, to the office. I like to just have my tinted moisturizer and concealer on for work, but bring eyeliner, mascara, eye-shadow, and whatever else is needed in a small makeup pouch that fits into my bag.

3. Shoes. The struggle. You don’t want to schlep around all day in your highest heels, but you don’t want to carry them in your bag for later. In this situation, If I reaaally wanted to wear the heels, I’d probably opt for the latter option. But to make life easier, I’d just choose a pair that works for both occasions: comfy wedges, or cute flat sandals.

4. And finally, the hair. Obviously you’d have to take the weather into consideration for this one, but I like to have my hair freshly washed and blown out that morning, styled in a way that will last. If I want my curls to last, I hairspray them and try to keep my hands off of ’em as much as possible. A compact brush/comb is perfect to carry in your bag for times like these when you need a quick touch-up.

Here’s one of my favorite transition outfits:

FullSizeRender (2)

Dress is from LF. Hair curled with my Sultra Wand, starting halfway down the strand.

Thanks! I hope you found this helpful! Don’t forget to stay updated on new posts by following my blog as well as my instagram account: brightskinbrighteyes

Love and smiles,

Steph

Nail Color Pick of the Week

image

As the days get hotter and the air a little more humid, I figured that’s my cue to change up my nail polish.

Today, I decided to go with Essie’s “Saltwater Happy”. If you want a unique color that is not too flashy, yet has the perfect balance between bright and pastel, this is the way to go.

Especially if you’re in the mood for a day at the beach (and you’re like me who hasn’t made it to the beach this Summer yet 😁).

Now that I’m rockin’ this color, there are no more excuses. Beach, I’m comin’ for ya!

Stay bright and beautiful…

Love and smiles,

Steph

Getting Ready for Work

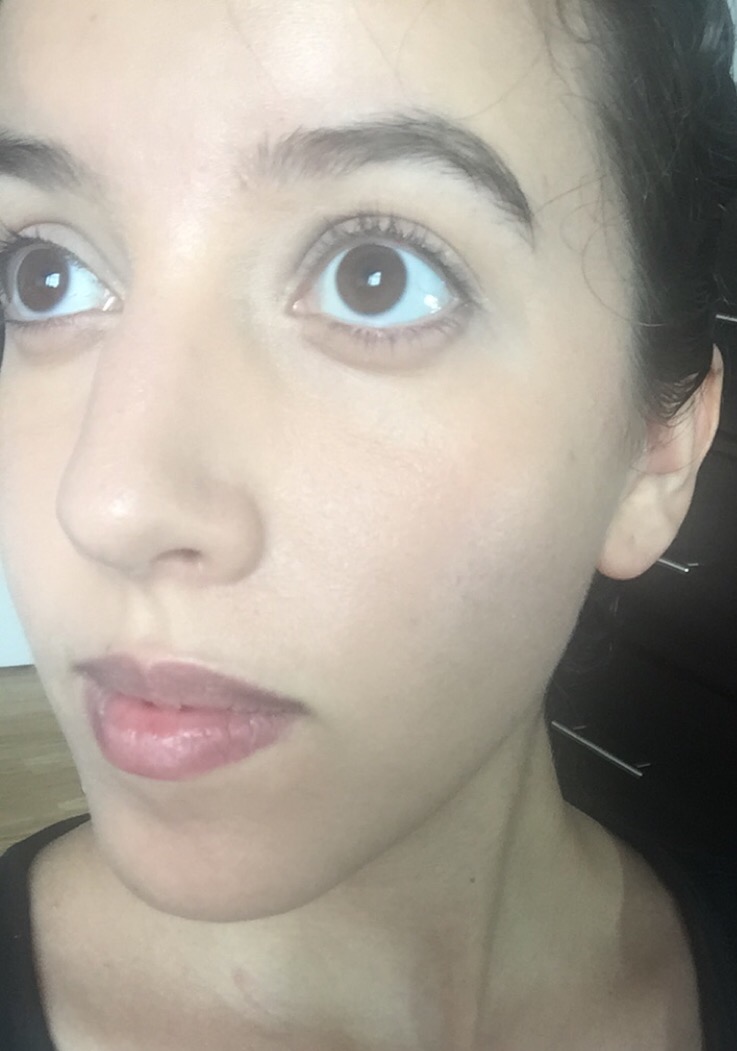
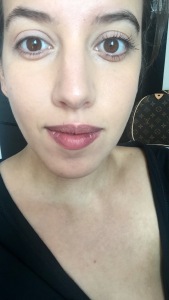
Welcome back! Today, I thought it would be nice to show you guys my daily makeup routine, specifically what I do when going to work.

After cleansing, moisturizing, etc. (see yesterday’s post), I proceed with the following steps:

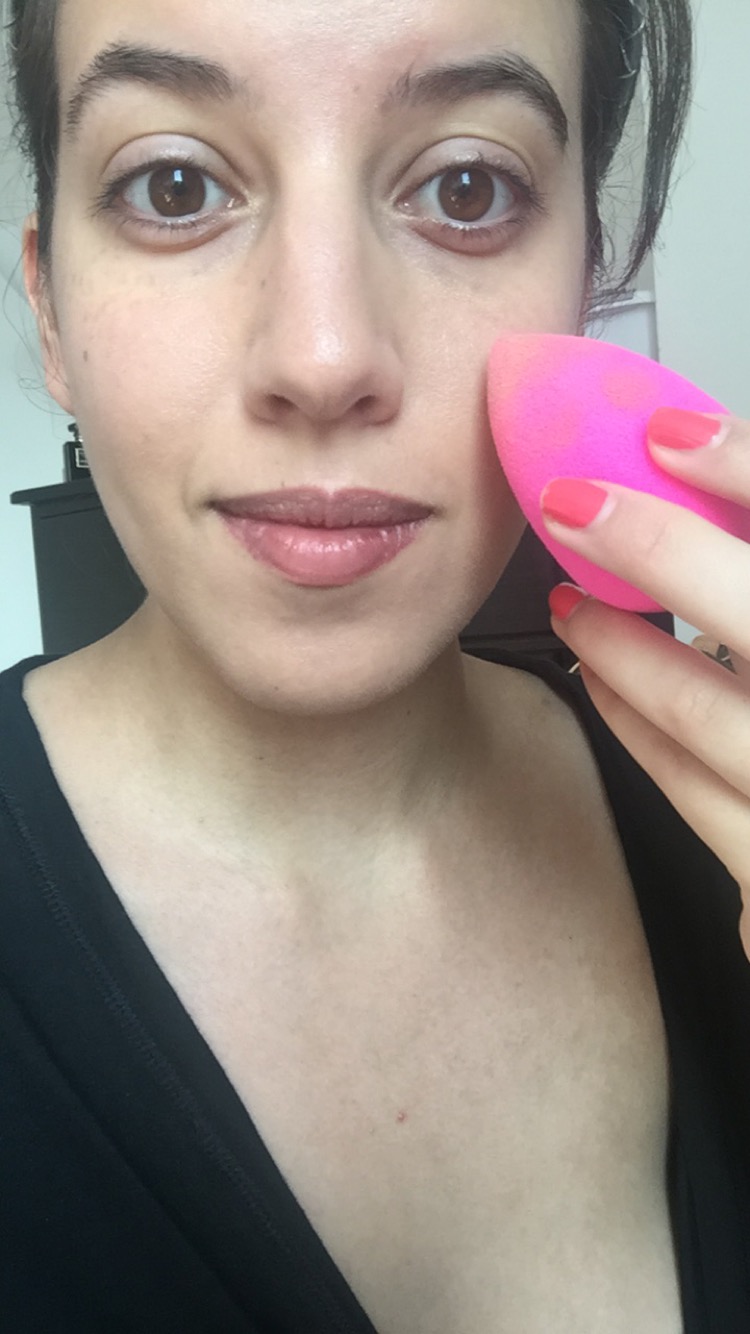
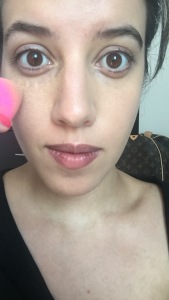
1. Apply tinted moisturizer with a beauty blender. I use Chanel’s All-in-one Healthy Glow Fluid with SPF 15. I love it!

IMG_1192

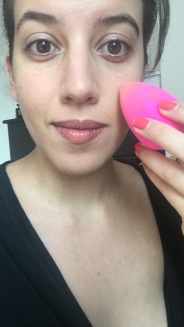
I seriously believe the beauty blender is the best applicator out there today. Be sure it is slightly damp, not dripping with water. You will immediately notice the difference in results that the beauty blender achieves vs. the results achieved with a brush. I will never go back.

2. Apply concealer with the beauty blender. I use MAC’s Select Cover-Up and have been for about 3 years now. I like to dot it under my eyes, then down the side length of my nose, forming somewhat of an upside down triangle, then blending it in.

IMG_1193

3. Apply eye shadow primer. I use Urban Decay’s Eyeshadow Primer Potion.

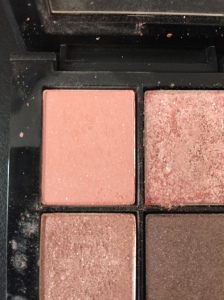
4. Apply eye shadow. I stick to very warm, neutral colors. You will rarely see me with a bold color on my eyes, unless I’m going to a fancy occasion. I used the soft pink in the top left corner of Sonia Kashuk’s eye quad.

IMG_0286

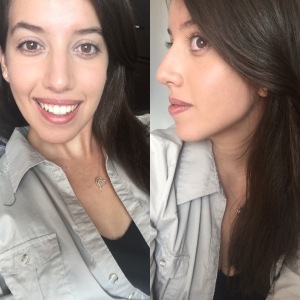
5. Apply mascara. When I ran out of my BUXOM Lash Mascara, I decided to try Benefit’s They’re Real! Mascara and I think I’m in love! It lasts allllll day and it makes such a difference in length.

Check out the difference on my right eye:

IMG_1195-1

Holding it horizontally, I wiggle my lashes, totaling to about 4 coats. Then I hold it vertically, utilizing the spikes at the end to separate and further lengthen my lashes.

I don’t wear lipstick, I prefer to leave them as they are, but I do apply my EOS lip balm and never leave my place without it!

*Don’t forget FIX+ at the end!

IMG_1200-1

As you can see, I’m more of an enhancer, rather than creator, when it comes to applying makeup. All of us have our own unique, beautiful features that you should be proud of letting the world see.

Here are the links to all the products I used for this look:

http://www.sephora.com/beautyblender-P228913?skuId=1151869

http://www.chanel.com/en_GB/fragrance-beauty/makeup/complexion/healthy-glow-makeup/les-beiges-all-in-one-healthy-glow-fluid-spf-15-p186810.html#page-1

https://www.maccosmetics.com/product/13844/278/Products/Makeup/Face/Concealer/Select-Cover-Up#/shade/NC20

http://www.sephora.com/eyeshadow-primer-potion-tube-original-P284716

http://www.target.com/p/sonia-kashuk-eye-shadow-quads/-/A-13347482?ref=tgt_adv_XSG10001&AFID=google_pla_df&LNM=13347482&CPNG=Health+Beauty&kpid=13347482&LID=17pgs&ci_src=17588969&ci_sku=13347482&kpid=13347482&gclid=CMvw_PmepsYCFRc8gQodm4IBRg

http://www.sephora.com/they-re-real-mascara-P289307

I hope you enjoyed this glowing, natural, everyday look! Keep coming back for more tips and tricks!

Until next time….

Love and smiles,

Steph

Summer Skincare Kickoff

Happy Monday! Hopefully the day is done, or almost done for most of you right now and you can have some time to yourself. On behalf of this super hot day, I want to show you step-by-step, how I keep my skin in tip-top shape in the heat. My skin tends to be pretty dry, ranging from super dry over the winter months to combination over the summer months. Here are the products that work best for me. I chose these products based on what makes my skin feel great, without having to pile on product after product (because who wants to suffocate their face when it feels like practically a sauna outside?!).

1. I start with a gentle cleanser. I’ve religiously used Erno Laszlo’s Sea Mud Deep Cleansing Bar. It thoroughly cleanses my skin, it is safe to use twice a day, everyday, and it never leaves my skin feeling tight or dry. Immediately upon rinsing, my skin emits the most perfect glow, and I’m ready for the next step.

2. Toner. Something I used to think wasn’t essential in my daily routine, but over the years, I’ve realized it is. It is the extra step you take after cleansing your skin and really removes any dirt or makeup that the cleanser didn’t catch. Make sure to find one for your skin’s texture. I use Erno Laszlo’s Light Controlling Lotion and I’m obsessed.

3. My next step is moisturizing. Wait for your toner to dry before applying moisturizer. Using Clinique’s “All About Eyes” eye cream and my drugstore-bought Neutrogena moisturizer, I achieve dewey-perfection. My skin is sensitive and tends to get rid if I use a product that is way to harsh. The eye cream is super gentle and primes my skin for my concealer. The face moisturizer is very moisturizing and does not feel heavy at all whatsoever. Keep in mind, this moisturizer DOES NOT contain SPF, so make sure to apply it after, or be sure that it is in your tinted moisturizer, foundation, etc. SPF is very important, especially over the summer.

4. My last favorite skincare product is MAC’s FIX +. This is what I like to spritz on when I’m done moisturizing, when I’m done with makeup, or it is perfect to spray onto a foundation brush to help make the product glide. All you need is a few spritz’s (don’t hold the bottle too close to your face) and voila! You’re ready to go.

I hope this helped you guys get a feel for how I care for my skin and I hope you use some of my tips throughout your routine. Any questions, leave them below!

IMG_1187

With these simple steps, this is what my skin ends up looking like:

FullSizeRender-1

Don’t forget to follow me on instagram: brightskinbrighteyes

Come back tomorrow for a step-by-step tutorial on makeup I wear for work!

Love and smiles,

Steph

Hello world!

Hiya beauties! My name is Stephanie. Welcome to my blog! Born with a passion for all things beauty, I invite you to join me along this wonderful journey as I show you what beauty products work best for me and you can hopefully use my advice to help make your own beauty decisions and purchases! I will always give my honest opinion about everything I talk about and if I’m ever unclear, please don’t hesitate to ask and I’ll respond to you ASAP! Since this is my first post, I figured I would do a little Q&A about myself:

1. How old are you/Where are you from?

I’m a 20-year old college student from New York.

2. What inspired you to start blogging?

I truly love learning about others’ beauty routines and I absolutely love taking care of my skin, styling my hair, and experimenting with makeup. I really want to put my ideas out there and give back to the world that inspired me.

3. What will your blog be focused on?

My main idea was skincare, but I’d like to incorporate hair and makeup tips as well, and perhaps throw in some fashion. Be prepared for some random anecdotes about my day-to-day life as well!

Now you know some basic facts about me and you’ll learn much more with each post I make! My goal is to blog at least 2-3 times a week, so check back often :).

I’ll be back tomorrow with my first official beauty post (YAY!) so be sure to visit tomorrow. If anyone has any requests or suggestions for topics definitely leave them in the comments below. I’ll be sure to read them and fulfill your requests.

Also, be sure to follow me on my new instagram account: brightskinbrighteyes       ❤

Love and smiles,

Steph

11170325_10206529342931330_7073150442299402106_n